

Last Updated: November 5, 2026
Quick Summary
Installing floating shelves safely means finding the studs, checking for pipes and wiring, and matching your anchors to your wall type before you drill. Hit at least two studs per bracket run, or use heavy-duty toggle bolts on drywall, and keep the load well under the weakest link's rating.
- Mark both edges of each stud and confirm with a small nail or thin drill bit.
- Scan the full bracket area for hidden pipes and cables before any drill bit touches the wall.
- Use at least four toggle bolts per shelf on drywall and keep heavy items near the bracket points.
- Kitchen shelves usually sit about 45 to 50 cm above the counter.
- Check the shelf after a week and again after a month for sagging or gaps.
Table of Contents
- Gather Your Floating Shelf Installation Tools Before You Start
- How to Find Studs in a Wall Before You Drill
- Check for Pipes and Wiring Before You Drill
- Choose the Right Floating Shelf Wall Anchors for Your Wall Type
- Measure, Level, and Attach the Mounting Bracket
- Understand Floating Shelf Weight Capacity and Load Planning
- Troubleshoot Common Floating Shelf Problems After Installation
- Shop the Tools to Install Your Floating Shelves Safely
- Frequently Asked Questions
Gather Your Floating Shelf Installation Tools Before You Start
Installing floating shelves safely starts with the right gear on the floor beside you before you touch the wall.
Floating shelves are wall-mounted boards that hide their support inside the shelf or behind it, so all you see is the shelf itself.
Here is what you need:
- Cordless drill with driver clutch
- Drill bits sized for your anchors and pilot holes
- Screwdriver bits, including Robertson and Phillips
- Spirit level, at least 60 cm long
- Measuring tape and a pencil
- Stud finder
- Wall anchors matched to your wall type
A drill and driver combo covers both jobs. A drill and driver combo kit, such as the DEWALT 20V MAX cordless drill and impact driver combo kit, covers pilot holes and driving screws.

New to power tools? Our guide on which power tools a new homeowner needs first walks through the basics. If you want help picking a drill, see our roundup of the best cordless drill for home use.
Watch out: Using a drill with no clutch on shelf screws strips the heads fast. Set the clutch low and increase it only if the screw stops biting.
How to Find Studs in a Wall Before You Drill
Run the stud finder slowly across the wall at shelf height. Mark both edges of each stud with a pencil.
Aim to hit at least two studs per bracket run. One stud alone will not hold a loaded shelf level over time.
For masonry or concrete walls, a hammer drill makes the job easier. The DEWALT 20V MAX compact hammer drill is a suitable option for those surfaces.

Watch out: Stud finders give false readings near metal corner beads and thick plaster. Always confirm with a test hole before committing.
Check for Pipes and Wiring Before You Drill
Before any drill bit touches the wall, scan for hidden pipes and electrical cables.
Follow these checks:
- Scan the full bracket area, not just the screw points
- Look for outlets, switches, and plumbing fixtures nearby
- Check the other side of the wall if you can access it
- Shut off power to nearby circuits before drilling
- Keep drill depth shallow until you clear the drywall
If you hit unexpected resistance or see a spark, stop immediately. A punctured pipe means water in the wall. A nicked cable is a shock risk.
For safe drilling guidance, Electrical Safety Authority guidance on drilling near wiring is worth a read before you start. When in doubt, call a licensed electrician.
Choose the Right Floating Shelf Wall Anchors for Your Wall Type
The right anchor depends entirely on what your wall is made of, how thick the panel is, and how much load you plan to put on the shelf. Using the wrong one is the number one reason floating shelves pull out of the wall. The table below is a starting point, but the notes after it matter more than the table itself.
| Wall Type | Best Fastener | Load Notes |
|---|---|---|
| Timber stud wall | Lag screws into studs | Strongest option; use studs where possible |
| Drywall, no studs | Heavy-duty toggle bolts | Good for moderate loads; spread the load across several |
| Drywall, light loads | Self-drilling drywall anchors | Small shelves only; keep weight low |
| Masonry or concrete | Sleeve anchors or wedge anchors | Very strong; needs a hammer drill |
| Plasterboard with metal studs | Snap toggles | Works well; avoid self-tapping screws alone |
Drywall Without Accessible Studs: When Heavy-Duty Anchors Are Appropriate
Toggle bolts and snap toggles are the correct choice when you cannot hit a stud but still need a shelf that holds more than a few kilograms.
A drywall-anchored floating shelf is generally suited to light to moderate loads, such as decorative items, small plants, or a few books, and not to heavy items like cast iron cookware or tool storage.
If your planned load exceeds what drywall anchors can safely carry, you have three options: relocate the shelf so the bracket lands on at least two studs, add a mounting cleat or backer board that spans the studs and gives the bracket solid material to bite into, or switch to a different shelf system that is designed to mount on a rail fixed to studs. Moving the shelf is almost always cheaper and safer than over-anchoring drywall.
Watch out: Toggle bolts need a hole large enough for the toggle to pass through, and an over-large hole weakens the drywall around the anchor.
Masonry and Concrete
Sleeve anchors and wedge anchors are the standard choice for brick, block, and poured concrete. They need a hammer drill and a bit matched to the anchor diameter, and the hole must be drilled slightly deeper than the anchor so dust does not bottom out the fastener. Blow or vacuum the dust out of the hole before inserting the anchor; trapped dust is a common cause of a loose masonry anchor.
Matching the Anchor to the Bracket
Match your anchor to the screw size the bracket maker specifies. Oversized holes weaken the wall, and an anchor that is too small for the bracket screw will not clamp the bracket firmly. If the bracket instructions call for a specific anchor type, follow them over any general table, including this one. The same care with anchor size and wall support matters when hanging art securely, especially for oversized pieces.
Measure, Level, and Attach the Mounting Bracket
Measure twice, mark once, and level before you drill. That order saves you from patching holes.
DEWALT 20V MAX* Cordless Drill and Impact Driver, Power Tool Combo Kit →
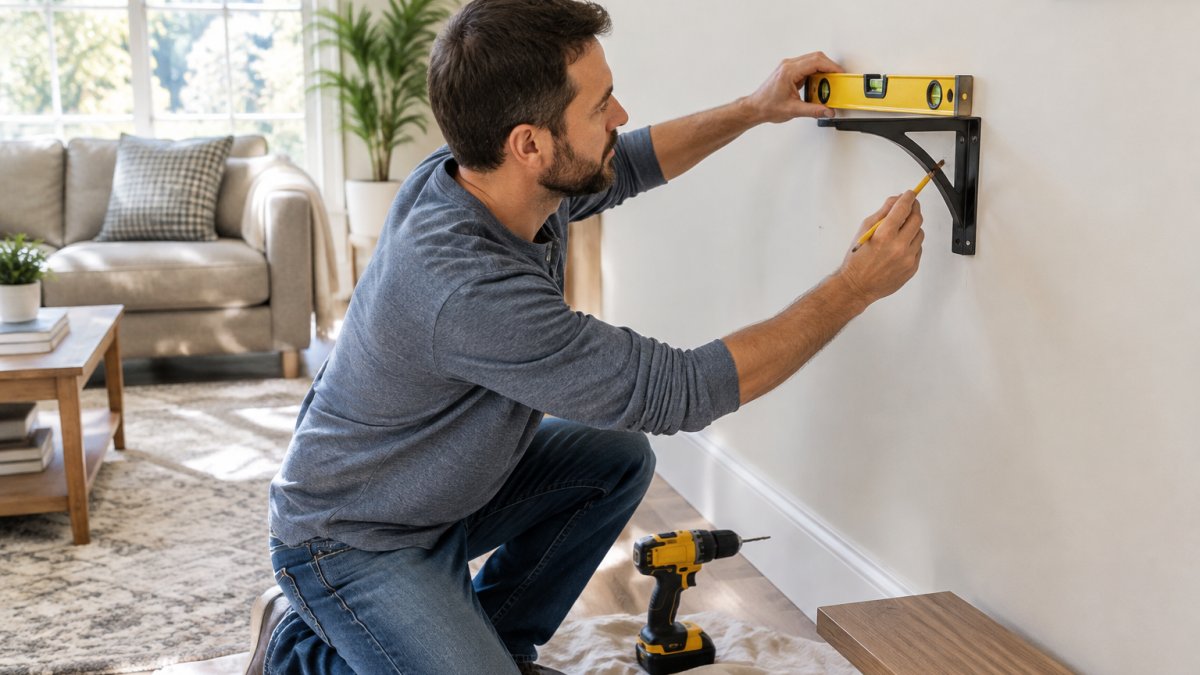
Start by deciding shelf height.
Next, hold the mounting bracket against the wall and check it with your spirit level.
Drive the screws in snug, not crushing. Check level again after each screw.
Use sharp bits sized to your screws. The DEWALT 2-inch mixed driver bit set includes a mix of Phillips and Robertson bits with a carabiner clip.

Slide the shelf onto the bracket and check the fit before loading anything.
Understand Floating Shelf Weight Capacity and Load Planning
Floating shelves hold less weight than they look like they should. The shelf, the bracket, the anchors, and the wall all share the load, and the weakest link sets the limit. The number printed on the shelf box is usually the shelf's own rating under ideal mounting conditions; it is not a promise about your wall.
How the Four Capacities Interact
Think of the system as four links in a chain:
- Shelf capacity, how much the board and its internal rod or channel can carry before it sags or cracks.
- Bracket capacity, how much the bracket and its welds or fixings can take before bending.
- Fastener capacity, the pull-out strength of the anchors or screws in the specific wall material.
- Wall capacity, how much the drywall, stud, or masonry can take before the fastener tears out or the panel crushes.
The installed shelf is only as strong as the weakest of these. A heavy-duty bracket screwed into drywall with light-duty anchors is a drywall-anchored shelf, not a stud-mounted one. A stud-mounted bracket on a thin shelf board is limited by the board. Plan to the weakest link, not the strongest component.
Distributed Load vs. Concentrated Load
A shelf rated for 20 kg evenly distributed is not rated for a 20 kg dumbbell sitting in the middle. Evenly distributed load spreads across the shelf length and shares the force between bracket points. Concentrated load puts the entire force on one spot, which multiplies the bending moment on the shelf and the pull-out force on the nearest anchor.
A concentrated load at the end of a shelf puts more stress on the nearest bracket than the same weight spread across the middle. In practice:
- Put heavy items near the bracket points, not at the ends.
- Spread weight along the shelf rather than stacking it in one spot.
- Treat a shelf with one heavy item as having a lower safe load than the same shelf with the weight spread out.
- Remember that books, cast iron, and full toolboxes weigh more than they look.
Planning Your Load
Before you load the shelf, write down what you plan to put on it and roughly what it weighs.
Check the shelf after a week, then again after a month.
Watch out: Never test a shelf's capacity by hanging on it or loading it to the stated limit. The stated limit assumes ideal mounting, and your wall is rarely ideal.
Troubleshoot Common Floating Shelf Problems After Installation
Most floating shelf problems show up in the first few weeks. Catching them early keeps a small fix from becoming a wall repair.
Here is what to do when things go wrong:
| Problem | Likely Cause | Fix |
|---|---|---|
| Shelf sags at one end | Bracket not level or screw loose | Re-level and tighten; add an anchor if needed |
| Shelf pulls away from wall | Anchor too small for the load | Switch to toggle bolts or relocate to studs |
| Shelf wobbles | Bracket screws not fully seated | Tighten screws; check pilot hole depth |
| Shelf will not slide on | Bracket misaligned or debris in channel | Loosen bracket, clear the channel, retry |
| Cracks around screws | Over-tightened or hole too close to edge | Patch and relocate the anchor point |
If a screw spins freely, the hole is stripped. Move up one anchor size or fill the hole with a hardwood dowel and glue, then redrill.
Watch out: Never just crank a loose screw tighter. If it keeps spinning, the anchor has failed and more torque will not save it.
Shop the Tools to Install Your Floating Shelves Safely
Safe installation comes down to three things: the right drill, sharp bits, and anchors matched to your wall. Everything else is patience and a level.
Home Essentials Outlet offers refurbished DEWALT tools backed by a DEWALT warranty.
Ready to hang your shelves the right way? Shop deals at Home Essentials Outlet and get the tools that make the job safe the first time.
Frequently Asked Questions
Do floating shelves need to be installed into studs?
Not always, but studs are the strongest option. If your bracket lines up with studs, drive screws straight into them for maximum hold. When studs are not in the right place, use heavy-duty floating shelf wall anchors rated for the load, or install a mounting board that spans two studs. Never rely on plain drywall plugs for shelves that will hold books, dishes, or tools. Check the bracket spacing against your stud layout before you drill.
How much weight can a floating shelf hold?
Floating shelf weight capacity depends on the bracket, the fasteners, and the wall. A shelf fixed into timber studs with the supplied screws typically holds more than one fixed with drywall anchors. The shelf's own rating is a starting point, not a guarantee. Spread heavy items toward the back and across the length, keep the heaviest objects near the brackets, and check the shelf for sagging or movement after loading it. If it flexes, remove weight and add fasteners.
What anchors should you use for floating shelves in drywall?
Use anchors designed for the load and the wall thickness, such as toggle bolts or heavy-duty expansion anchors, and match the screw size to the anchor. Toggle bolts spread the load behind the drywall, which suits hollow walls without accessible studs. Follow the anchor's stated capacity and stay well under it. If no stud is available and the shelf will carry real weight, a mounting board fixed across two studs is the safer route than a single anchor point.
How do you install floating shelves on brick or concrete?
Masonry needs a hammer drill and masonry bits, plus anchors made for concrete or brick. Mark your bracket positions, drill pilot holes to the anchor's specified depth, clear the dust, and tap the anchors in before driving the screws. A DEWALT 20V hammer drill handles this job well. Check for pipes and wiring first, keep the shelf's load within the anchor rating, and confirm the bracket sits flush against the wall before sliding the shelf on.


